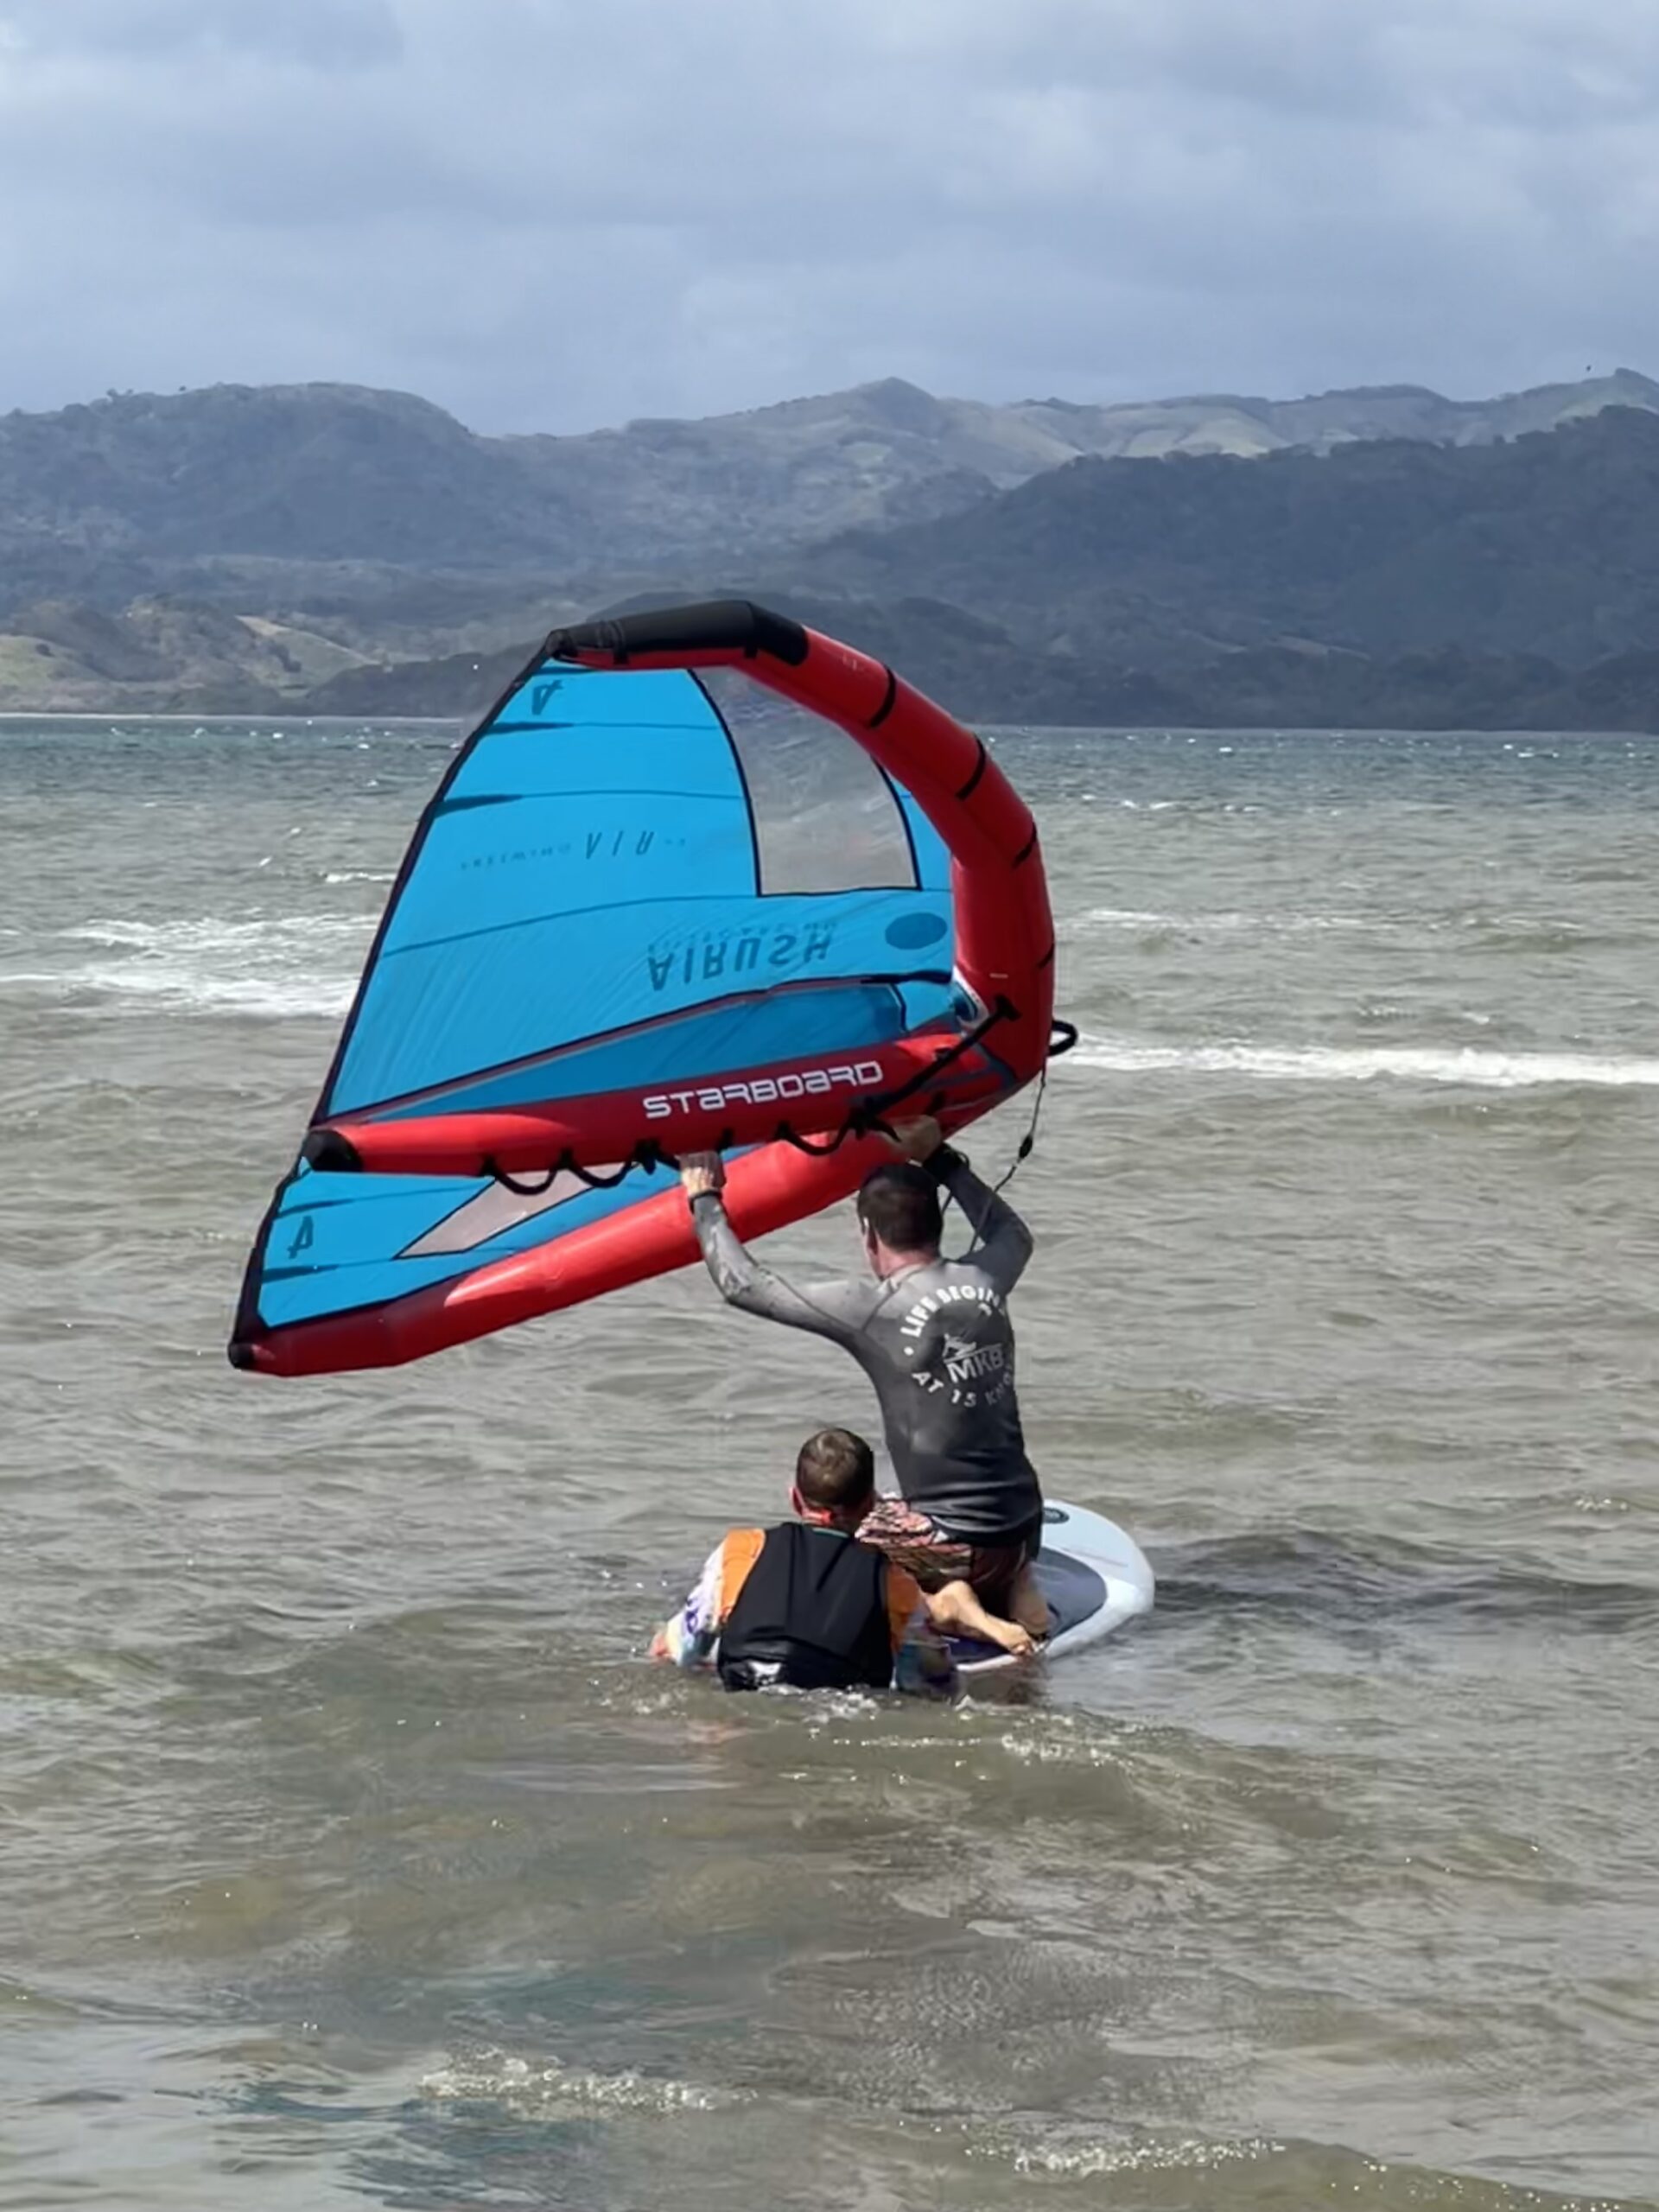
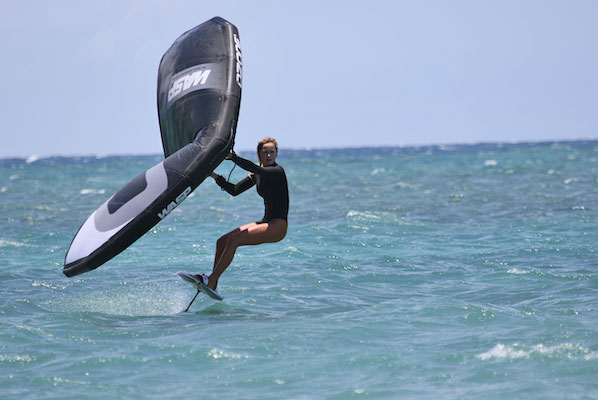
WING FOILING LESSON
Lessons will be scheduled depending on tides, cause it’s not possible to teach properly in low tide. When the wind is over 25 knots lessons will stop for the safety of the student.
PRIVATE LESSONS INCLUDING GEAR:
- beginner/Intermediate private lessons: $80 per hour.
- 2h package: $150
- 6h package $420
GROUP LESSONS INCLUDING GEAR:
- beginner/intermediate, price per person: $60 per hour
- 2h package: $110
- 6h package: $350
The instructors will help students set realistic goals and achieve them depending on the level, using radio helmet communication when needed. Consider that usually after 2h students can feel tired.
For those Wingfoiler that are completely independent, we have the full material FOR RENT:
- $100 per day
- $60 up to 1 hour
- 3 day package:$255
These prices are by cash only. PayPal payments get an overcharge of 6%
Level Descriptions Beginner WING SURFING on Paddle Boards
Prerequisite Skills Before Foiling
Land Simulation for board control – posture and stance
On Beach Standing, then knees to one knee to standing progression.
Feet placement on center line, equal heel/toe pressure – when riding a SUP with a SUPWinder centerboard.
If riding a SUP without a centerboard, you will need supplemental instruction at the end of the 12 steps to apply the correct heel pressure needed to “edge” your way upwind. This also requires fine tuning of your stance and weight distribution.
“Shimmy Slide” moving forward/backward, heelside/toeside without lifting feet.
Weight evenly distributed, weight favoring front foot and favoring backfoot depending upon direction of travel
Knees to one knee to standing, landing on centerline.
Repeat all exercises goofy and regular (dominant foot in the rear, or switch with dominant in the front)
Land Simulation for wing control – Knees to standing.
Start Standing:
Birds flap their wings, but never stop in the down position – They soar/float with wings raised so they are lifted rather than stalled. Anytime you feel like you’re being pulled over your toes and bent in half, just open the wing by extending your back hand, raising the tail and spilling power. This will lift you up rather than pull you over.
Raising the nose and/or lowering Level Descriptions Beginner WING SURFING on Paddle Boards
Prerequisite Skills Before Foiling
Land Simulation for board control – posture and stance
On Beach Standing, then knees to one knee to standing progression.
Feet placement on center line, equal heel/toe pressure – when riding a SUP with a SUPWinder centerboard.
If riding a SUP without a centerboard, you will need supplemental instruction at the end of the 12 steps to apply the correct heel pressure needed to “edge” your way upwind. This also requires fine tuning of your stance and weight distribution.
“Shimmy Slide” moving forward/backward, heelside/toeside without lifting feet.
Weight evenly distributed, weight favoring front foot and favoring backfoot depending upon direction of travel
Knees to one knee to standing, landing on centerline.
Repeat all exercises goofy and regular (dominant foot in the rear, or switch with dominant in the front)
Land Simulation for wing control – Knees to standing.
Start Standing:
Birds flap their wings, but never stop in the down position – They soar/float with wings raised so they are lifted rather than stalled. Anytime you feel like you’re being pulled over your toes and bent in half, just open the wing by extending your back hand, raising the tail and spilling power. This will lift you up rather than pull you over.
Raising the nose and/or lowering the tail makes the bird rise up.
Raising the tail and/or lowering the nose makes the bird dive down.
Moving your front hand on the bird’s nose one degree forward will begin a dive.
Moving your back hand on the bird’s tail two degrees forward will stop the dive and begin to fly back up overhead.
Repeat goofy and regular.
Get a rhythm gently moving the wing a little up and down.
Movement increases the wind strength and changes the direction. Add figure 8”s walking across the wind 10 steps, stopping, switching hands and directions. Repeat without stopping, switching hands in the middle of the downwind turns.
Starting on knees, Add the board skills from part #1 flying the wing directly overhead, flap the wing while rising from one knee to help lift you.
Practice rising with the flap goofy and regular, followed by moving forward.
Upwind/Downwind handle positions: extend forward using back handles with front foot weighted to go downwind, “wrap” the wing “around towards the tail of the board using forward handles with weight on back foot to go upwind. Centered to go crosswind.
Apparent Wind simulation: First draw lines in the sand to indicate true wind direction with the board 90 degrees to the wind demonstrating wing angle when stationary. Then draw the induced wind created from forward motion creating the apparent wind at 45 degrees (have editing draw lines on screen). Then place the board bag/simulator at 45 degrees to the wind, simulating the combination of true wind and induced wind so students can be stationary on the beach, but holding the wing in the position they need when in motion, as compared to stationary with wind at their backs. This allows them to understand why riders in motion are holding the wing with the nose pointing towards the front of the board rather than directly into the wind when motionless. This also allows for practicing the upwind “wrap” stance to point upwind.
Seated on a beach with a board in front of you: “Rotating” the skimboard with your feet – pushing with one, pulling with the other: this is one way to rotate the board while using the leverage from the wing to twist against.
Roll Pitch Yaw – 3 axis of rotation. Roll is left wing v right wing up/down. Pitch is nose v tail up/down. Yaw is like the bird is on a turntable rotating a little clockwise or counterclockwise. Roll determines if the wing is lifting more, or pulling more. Pitch controls the amount of power, and Yaw is adjusted to accommodate apparent wind changes.
Water Practice for wing control in motion on a soft tethered platform – seated and knees.
Recap how forward motion creates wind that changes the flight or the wing, requiring adjustment: Movement changes the wind strength and direction.
Riding a bike at 10 mph downwind with a 10 mph tail wind creates a bubble of calm (zero wind) – For Wing Surfing this is the best time to flip the sail from one direction to the other.
Riding a bike straight into the wind at 10 mph creates 20 mph in your face. This is impossible with Wing Surfing.
Riding a bike across the wind creates a combined wind of 14 mph.. On the side of your face. This is the Goldilocks Zone for wind sports. On water, this usually provides 50% more power, but also at a 45 degree angle to the true wind.
On snow and ice, this geometry can provide more than double the power and speed of the wind… and the angle of the wind hitting the nose of your wing is also affected.
This is why we have to make the gentle “sine wave” up/down with the wing.
As you speed up, the location of “neutral” shifts farther and farther forward towards the nose of the board, despite having been straight at your back when you stood up.
Practice the up/down/cross wind handle positions, complemented by twisting the torso opposite of the wing position to rotate the platform below you. Lead with your head, shoulders, hips to rotate the platform while leveraging the wind in the wing to turn – like sitting on a stool holding the table.
Water Practice for wing and board control in motion on a tethered board – knees and standing. Must be able to hold the board at steady upwind, crosswind and downwind positions.
Repeat exercises from #3 on knees.
When standing, focus on long arms with the wing above your head, slight knee bend and Hips Forward of your Shoulders to maintain balance and leverage.
Safety Protocols – Navigation, Self Rescue and rules of the road for boating.
It’s better to sit down than fall down. Counting while riding helps maintain a sense of time elapsed – 10 seconds of riding followed by releasing the wing and sitting down. Turn around and return. Check if you returned from your departure point, or if you traveled downwind or upwind.
Wear water shoes or sneakers to improve grip on board, and protect from sticks and stones in the water and sand.
Look for significant geographical markers (lighthouse, pier, colored houses etc) because when you ride out, things look different than from shore.
Ride with others, or tell a friend you are going into the lake.
Wear your vest! Wear a wetsuit in less than 70 degree water.
Practice placement of the wing on the tail of the board, secured with the top of your feet while paddling on your belly for Self Rescue to travel upwind, back to shore when the wind stops, or if you have a problem.
Wind powered craft have right of way over motorboats, but that is little comfort if you’ve been run over. Assume the other crafts don’t see you and/or don’t know/care about the rules.
Leash management. Don’t cross your board leash with your wing leash. Beginners should always sit down, release the wing, carefully slide the nose of the board under the wing to turn the board and have the wing floating on the downwind side.
IF you tangle your leashes: Sit on your board with legs gripping the edges to hold it and maintain balance. If your board has a strap handle on the deck, secure the wing leash to that handle, then remove your board leash and carefully weave it out of the wing leash.
IF your board does not have a handle, Keep it strapped in place on you and weave the board leash out of the wing leash. Be aware of any chop, waves, or boat wakes that might tip you over while focusing on your leashes.
First Rides – Walk/Paddle 20 yards out, knee surfing back to shore.
Repeat until the gentle up/down wave is achieved in motion.
Practice upwind downwind and crosswind handles and positions. Always start with the board and wing at 90 degrees (square) to each other.
Awareness of board angle to the waves – cutting into oncoming waves is upwind, cutting across the waves is crosswind, and riding with waves is downwind. Riding a wave downwind combines the wave power with the wind power, and often results in the wing dropping out of the air because there is zero wind hitting it.
Walk/Paddle 20 yards out, knees to standing, back to shore.
Repeat until posture and control are achieved upwind and downwind.
Recap the turning exercises and leash management.
“Switch Stance” – Ride out on knees 20 yards, Stop. Dismount. Turn. Return to shore on knees. Release Wing and Dismount before hitting the shallows.
Switch Stance – Knees to standing, ride 10 yards. Stop. Turn. Return to shore. Release wing and dismount.
Sit Down, Don’t Fall Down.
Don’t jump off landing hard in shallow water, there are occasional rocks and obstructions.
Careful not to break your fin hitting shallow water.
Practice Triangle: Paddle upwind in self rescue mode – Ride out while counting to 10, turn, return to shore, paddle back upwind.
Awareness of your navigational markers, and restrictions. First rides can cause tunnel-vision where riders only pay attention to their immediate bubble.
Look for other boaters/surfers, swimmers, obstructions, markers and stay far away from the shipping channel: If you are anywhere near the channel paddle away self rescue style immediately.
Ride out “upwind”, turn ride back upwind returning to where you started.
Focus on posture for leverage, looking where you’re going/not where you are.
Remember it’s better to sit down than to fall down, if you’re feeling unstable – Don’t fight Mother Nature.
Remember that the birds never hold their wings in the down position – If you are being pulled towards your toes, you are holding the back hand too hard.
Continue practicing within 20 seconds of shore until you consistently can navigate upwind.
Don’t ride farther than you can paddle – self rescue.
Board and Wing management for entry and exiting the water.
Keep the board fins away from your wing.
Keep the board fins away from your body, and others.
Don’t leave your board with the fin in the sand, people like to step on it.
Hold the wing with your down wind hand, and your board in the upwind hand – fin facing away from you and your wing.
Riding upwind on a SUP without a centerboard (SUPWinder Fin)
Your foot position must be slightly more towards the heel edge than centerline.
Your stance must raise the nose of the board a little so you engage the rail (edge)of the tail of the board – this allows you to edge upwind, or across the wind.
The centerboard fin compliments the power of the wing, making it faster in light wind… you will need a little more wind in order to steer without the centerboard. But you’ll be able to ride waves better without a center fin.
The best way to train for board skills and carving is with a SUP is at 5 – 15 mph behind a motorboat.
Transitions: Turning Around
Going upwind and in a straight line is easier with a center fin, but more difficult to turn around. The good news is that you only use the center fin for light winds so you’ll have time to gently leverage your wing against your feet to rotate the board.
Going upwind and in a straight line without a center fin requires more precision for stance (foot placement + weight distribution), but is much easier to turn… tail makes the bird rise up.
Raising the tail and/or lowering the nose makes the bird dive down.
Moving your front hand on the bird’s nose one degree forward will begin a dive.
Moving your back hand on the bird’s tail two degrees forward will stop the dive and begin to fly back up overhead.
Repeat goofy and regular.
Get a rhythm gently moving the wing a little up and down.
Movement increases the wind strength and changes the direction. Add figure 8”s walking across the wind 10 steps, stopping, switching hands and directions. Repeat without stopping, switching hands in the middle of the downwind turns.
Starting on knees, Add the board skills from part #1 flying the wing directly overhead, flap the wing while rising from one knee to help lift you.
Practice rising with the flap goofy and regular, followed by moving forward.
Upwind/Downwind handle positions: extend forward using back handles with front foot weighted to go downwind, “wrap” the wing “around towards the tail of the board using forward handles with weight on back foot to go upwind. Centered to go crosswind.